DIY ProjectsHomemade Dog House Camper Project

Homemade Dog House Camper Project

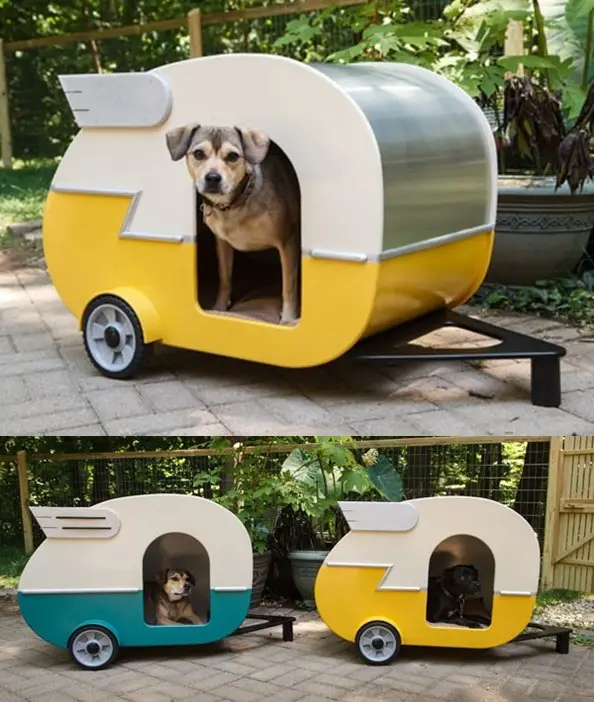
This homemade dog house camper project is detailed in this step by step tutorial that will give your pet a perfect place to cuddle up and nap. You will have one of the biggest attention grabbers for your pets when your friends, family, and neighbors catch sight of this adorable playhouse you’ve made.

Homemade Dog House Camper Project

For all of the dog lovers out there, this will help if you are on the prowl for the next big amazing dog house for your dogs at home. You are going to love this idea and design for your dogs. It is actually pretty cool as well as a functional playhouse that you can make yourself.

This little dog house shasta camper is just the ticket a person that likes nostalgic dog furniture pieces for your dogs to enjoy.

To make one of your very own for your dog, you will need several pieces of different woods in different sizes for the shaping, siding, and overall structure of this playhouse. You will also need to gather some wheels, primer, paints, and nails. Along with these materials, you’ll need some tools to get this project underway and made for your pups next big adventure within your home. Your dog will adore their new toy and you will have hours of satisfaction watching them enjoy it as well.

 Materials:

1 sheet 1/2″ Baltic Birch plywood
1 pc 2’x4′ x 1/2″ AC ply (side template)
1 pc 2′ x 4′ 3/4″ project plywood (gluing blocks)
2 pc 2′ x 4′ 1/4″ luan plywood (routing templates)
1 sheet bending plywood, cross grain
2 pcs pine/spruce milled to 1 1/8″ x 1″ x 20″ – bottom cross braces
2 pcs pine/spruce milled to 1 1/8″ x 1″ x 20″ – top cross braces
2 pcs pine/spruce milled to 1′ x 7/8″ x 24″ – bottom support cleats
2 pcs pine 1/2″ x 8′ quarter round – kerfing
2 pcs pine 5/8″ x 8′ half round – exterior trim
1 pc 1/2 x 36″ hollow round steel stock – axle
2 7″ lawn mower wheels
1 small roll 20″ aluminum flashing
1 qt primer ( Zinsser cover stain exterior-interior)
1 qt finish coat white
1 qt top color finish
1 qt bottom color finish
1/2 pt aluminum paint – trim
foam brushes
masking tape
small tube pure silicone
1 tube acrylic caulk
finish nails
24 3/4″ by #4 wood screws
Titebond II glue

Tools needed for the project:

table saw
band saw
jig saw
drill, 1/2″ bit
router, top bearing bit, 1/4″ and 1/8″ round over bits
3 ratchet tie downs (to be used as strap clamps)
Many clamps 16 -20 C clamps, 3″ capacity, 40-50 spring clamps, 1 1/2 ”
capacity – you can’t have too many
mat knife
metal straight edge 24″
caulk gun
putty knife
chisel(s)
hammer

Click here to read about how to make a homemade dog house camper project:

http://thebark.com/content/barks-diy-first-place-winner-advanced-level
.
.

Here is the website link for a downloaded PDF:

http://thebark.com/sites/default/files/the_barks_diy_-_puppy_camper_playhouse.pdf

Melissa Francis
Melissa Francis
Greetings! I'm Melissa Francis, the founder and primary contributor to The Homestead Survival. With over 20 years of experience in homesteading, sustainability, and emergency preparedness, I've dedicated my life to helping others achieve a simpler, more self-reliant lifestyle.

Subscribe Today

GET EXCLUSIVE FULL ACCESS TO PREMIUM CONTENT

Get unlimited access to our EXCLUSIVE Content and our archive of subscriber stories.

Exclusive content

Latest articles

Popular Articles

More articles