

Discover the process of building a self-sustaining garden with this comprehensive guide.
Ever wondered about a garden that can water and fertilize itself?
Introduction to Keyhole Gardens
This simple concept is realized through a keyhole raised bed, which can be easily constructed with minimal tools and affordable materials. Keyhole gardens are gaining popularity worldwide and can be made using bricks, stones, or rocks to hold the soil in place. Organic materials from the garden (like lawn clippings and leaves) and kitchen scraps that would typically be composted are added directly into the central core to nourish the surrounding soil.
We decided to build a keyhole garden at Valhalla, with the intention of constructing more if our first attempt is successful. Here’s a step-by-step visual guide on how we approached our first keyhole garden project. Keep in mind, this guide documents our experience during our initial attempt and is not a definitive set of instructions for creating a flawless keyhole garden.
Step 1: Marking the Garden Circles
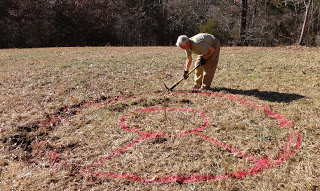
We marked two circles on the ground with spray paint, one smaller and one larger, using string and a central stake. The entryway between the circles is wider than usual for easier access to those with mobility challenges. We then dug a narrow trench along the outer circle, about two to three inches deep.
Step 2: Laying the First Row of Bricks
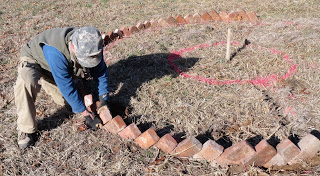
We placed bricks at a 45-degree angle in the outer circle trench, angling them slightly inward and stabilizing them with dirt on both sides. The first row was completed quickly using the available bricks at Valhalla.
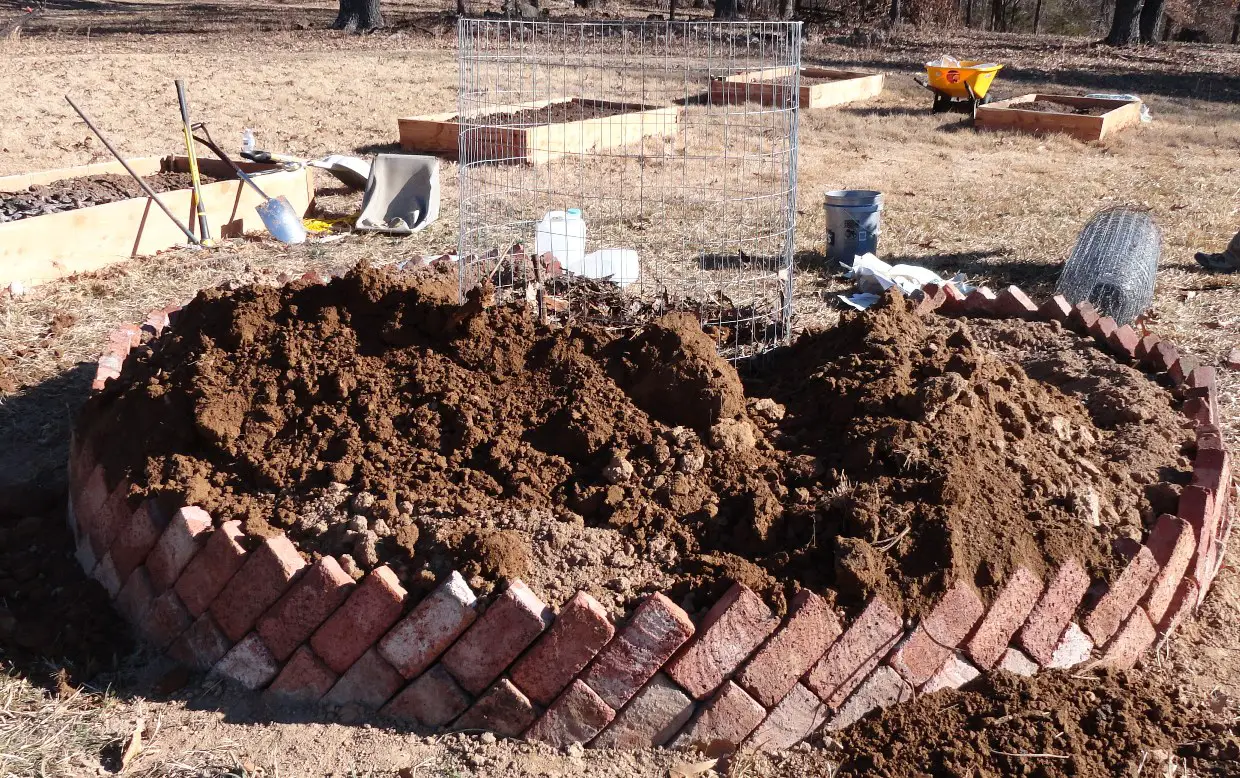
Step 3: Building the Compost Cage
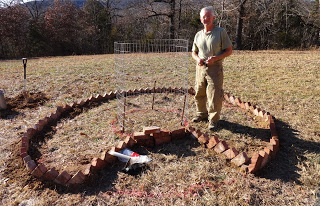
We secured three old pipes into the ground and wrapped a 4-foot high wire mesh cage around them, creating a round cage and fastening the wire to the stakes with wire ties. This is where compost materials, like leaves, grass, and kitchen scraps, will be added.
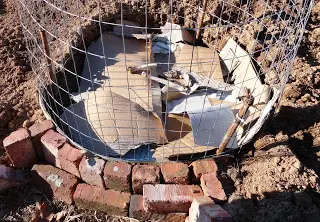
Step 4: Lining the Bottom of the Bed
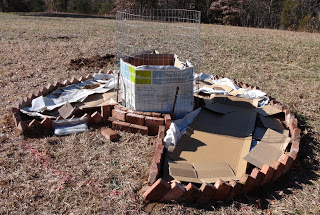
We lined the bottom of the bed with paper and cardboard to prevent weed growth and created a temporary barrier inside the cage to keep dirt out during construction. The paper and cardboard will add carbon to the compost and serve as a substrate for microbes that help nourish the soil.
Step 5: Adding the First Layer of Topsoil

from the waiting mini-mountains of dirt.
We added the first layer of topsoil, which was generously provided by a Valhalla volunteer and a tractor with a bucket attachment, making the process much easier.
Step 6: Stacking the Second Row of Bricks
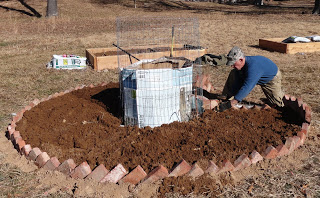
After carefully dumping the topsoil, we spread it evenly over the paper and cardboard. As we stacked the second row of bricks, it became clear that more dirt was needed to support them. We opted not to use mortar, following the example of African women who built keyhole gardens with bricks alone.
Step 7: Completing the Second Row of Bricks
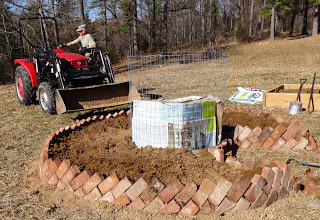
With additional topsoil for support, the second row of bricks was installed quickly, angling them inward for stability. The structure held up well, even when accidentally subjected to extra pressure from a tractor bucket-load of dirt.
Step 8: Filling the Compost Cage
Next, we began filling the bottom of the compost cage with paper, cardboard, and sun-bleached deer bones for added calcium. This prevents topsoil from falling in and contributes to the composting process.
Step 9: Adding Essential Compost Materials
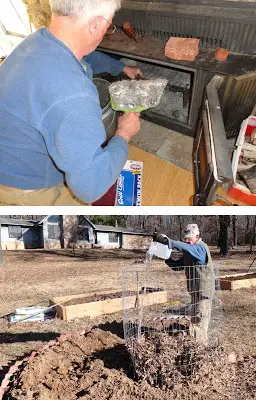
well water over the first layers of organic materials inside the keyhole garden bed’s composting cage.
We added essential compost materials like chopped leaves, bedding from the Guinea Fowl Palace, wood ash from the fireplace, and water. We plan to install a rainwater collection system to facilitate watering in the future.
Step 10: Preparing for the Third Row of Bricks
We added more topsoil to the bed in preparation for the third row of bricks, ensuring the compost in the center cage remained protected.
Step 11: Spreading Biochar and Store-Bought Compost
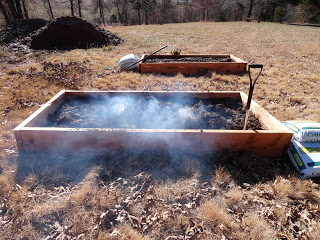
beds by partially burning and then smoldering piles
of sticks collected off the ground under trees.
With help from microbes and the earth worms that
will be added later, this charcoal will rot and
slowly release carbon and nutrients into the soil.
We prepared some biochar by burning small sticks and spread it around the keyhole garden bed outside the cage, along with several bags of store-bought compost.
Step 12: Finishing the Keyhole Garden
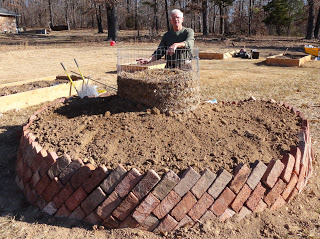
for worms, more compost, and finally planting
during this coming spring.
After completing the third row of bricks and adding more composting materials, our first keyhole garden was finished! We’ll soon add earthworms and monitor the garden’s performance during heavy rains. If it holds up well, we’ll build a second keyhole
Potential benefits of this self-sustaining gardening method
As we wait for the results of our first keyhole garden attempt, we’re excited about the potential benefits of this self-sustaining gardening method. The keyhole garden design allows for composting organic materials right inside their final destination, eliminating a time-consuming step in traditional gardening approaches.
In the coming months, we’ll observe the garden’s progress, including how well it holds up during heavy rains and the impact of the added earthworms. With success, we plan to expand and build additional keyhole gardens, embracing this innovative and efficient gardening technique at Valhalla.
As we continue our journey in sustainable gardening, we hope our step-by-step guide inspires you to experiment with keyhole gardens in your own backyard. Remember that this guide is based on our own experiences and is not a definitive set of instructions. Feel free to adapt the process to your specific needs and local conditions, and don’t be afraid to learn from any potential mistakes along the way. Happy gardening!
Disclaimer: I would like to express my gratitude to the original authors of this tutorial, which was published over 10 years ago but had since vanished from the internet. Fortunately, we were able to locate it in the archives and have made efforts to restore it as closely as possible, so that the knowledge can be shared with the new generation of homestead enthusiasts. It is regrettable that we were unable to contact any members of the original team who worked on this project. Please note that the content of this page is intended solely for educational purposes.