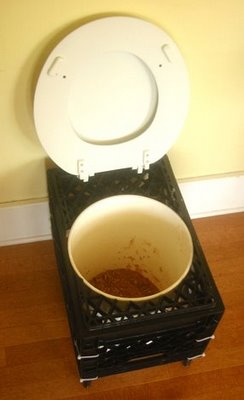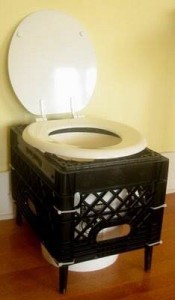
In an emergency disaster event the water supply to our bathrooms in our houses may stop completely making human waste sanitation a real challenge.
Yes, my thoughts went to ” I will do my business in the bushes outside if this happens” but honestly I do not see myself baring my naked bottom in front of my neighbors in the daylight and being comfortable enough to even do my (what should be private) business.
What if it was unsafe to go outside ?
This article is focused on making a stable temporary toilet.
Modern toilets take two valuable resources, water and nitrogen rich human waste, and combine the two to create a problem: sewage. In a dry or “humanure” toilet, you cover your deposits with a layer of non-toxic sawdust. Once the toilet is full you dump the contents into your outdoor humanure pile and compost the waste at high temperatures for at least a year. You can then use that compost as fertilizer for plants. The ubiquitous five gallon bucket is the most commonly used humanure receptacle. Most humanure toilet designs I’ve seen such as the ones on Joseph Jenkin’s website make use of wood which I’m not crazy about in the wet environment of a bathroom. Even with a coat of paint wood gets grungy. Alternatively, you can buy plastic camping toilet seats that will clamp on to a five gallon bucket but they have, in my opinion, an unacceptable wobble when you sit on them. For these reasons I designed a sturdy dry toilet making use of a scavenged milk crate. Even if the idea of humanure grosses you out (and it’s definitely the most controversial subject in our book), our milk crate toilet would be great for camping, emergencies or your remote cabin.
Putting this toilet together takes just a few minutes. First, find a milk or beer crate and a five gallon bucket. Make sure that the crate you use is large enough to accommodate the bucket. And note, I know of someone arrested for scavenging beer crates behind a strip club, of all places, so be discreet or ask for permission. Incidentally, when the police finished booking the beer crate scavenger the officer placed the paperwork in . . . a scavenged beer crate doubling as an in box!
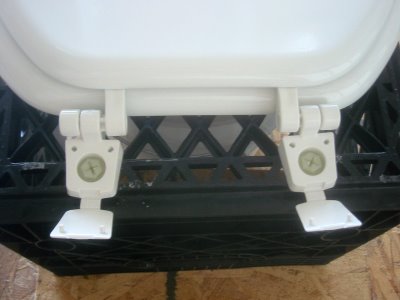 Attaching the Toilet Seat to the Crate
Next, find a toilet seat. Forage one or pick up a cheap seat at your local hardware store. In an emergency situation, you could also use the one on your regular toilet and simply bolt it back on when the zombie threat has passed and the sewage pipes are flowing again. To attach the seat to the milk crate simply position the plastic bolts and nuts that come with the lid in the center and on the short end of the bottom of the crate. Don’t over tighten.
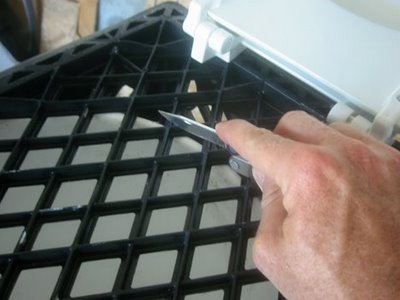 Cutting Out a Hole in the Crate
Place the bucket so that it will be appropriately positioned under the seat. Mark the outline of the bucket on the crate with a knife and cut out a circle with a jigsaw or keyhole saw so that the bucket will fit through the former bottom of the crate.
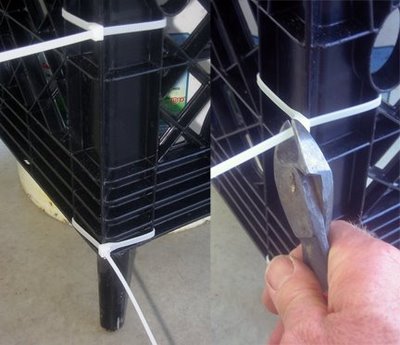 Attaching Legs to the Crate with Cable Ties
Cut four pieces of scrap wood (we found some old table legs for a more finished look), and attach them to each corner of the crate so that the bucket projects about a 1/2-inch above the level of the crate. The legs will be approximately 13 1/2-inches. Make sure that the toilet seat will fit snugly against the top of the bucket. We attached the legs with cable ties, but you could also use screws or bolts.
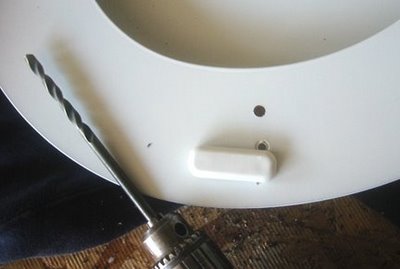 Moving the Spacer
The last step is to move the spacer on the bottom of the lid, so that it does not hit the top of the bucket. Pop it out with a knife or chisel, drill another hole, and reposition.
Your humanure toilet is now done and ready for use. Simply lift the crate off the bucket when it comes time to empty the contents. Follow the detailed instructions on Joseph Jenkin’s website to learn how to properly compost human waste.
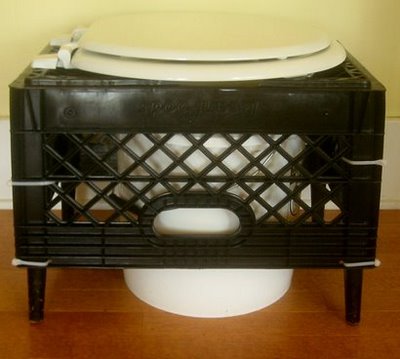 This toilet is simple to make, easy to clean, and is made of readily available materials. I think this particular design will be useful in emergencies and, when combined with Jenkin’s excellent humanure methods, would prevent the dangerous raw sewage nightmares of the sort we saw in the aftermath of hurricane Katrina and Hurricane Sandy.
There is a creative commons license on all the text and photos on this website so feel free to translate and disseminate this post widely. We’re “open source” here at Homegrown Evolution. If you make an improvement in the design please let us know.

