
Are you in search of practical tips and advice on restoring and refinishing old wood furniture? Then this article is for you. Note that despite the fact that solid wood is one of the materials used in creating furniture that will last a lifetime, it will still suffer from the accumulation of grime and dirt as time passes.
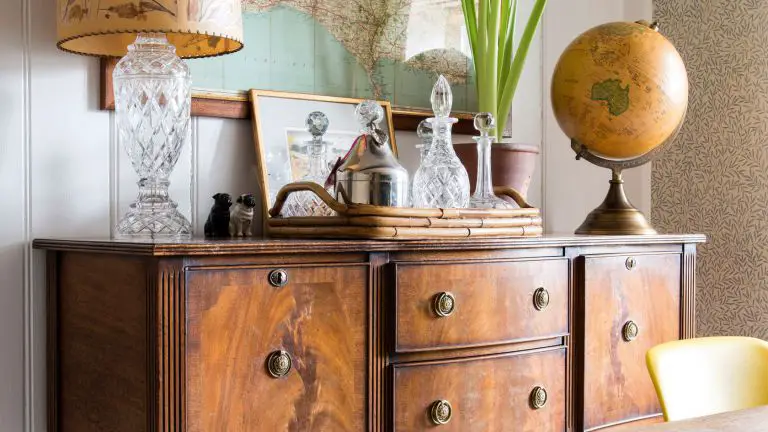
Solid wood furniture is also noticeable for its classic beauty. However, if you neglect it, it will diminish its luster and natural color over time, causing its dull appearance. If you own several old pieces of wooden furniture then you may be wondering how you can restore them.
One way to bring back the beauty of these treasured pieces is to refinish them. Here are just a few of the reasons why refinishing old wood furniture is a better idea than giving in to the urge of buying a new one:
- It saves your money.
- It is eco-friendly.
- It lets you make a completely new style without the need to look for a new piece.
- It preserves your existing wooden furniture’s value.
- It can offer the comfort you need and your preferred interior design.
- It allows you to build brand new pieces of furniture that reflect your taste and preferences and blend with your home decorations.
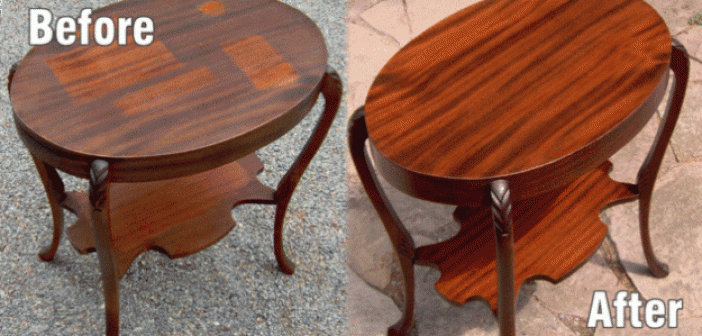
The reasons above may motivate you to begin refinishing your old wood furniture pieces now, instead of spending money on new ones. Basically, the whole refinishing process involves the use of a power sander or finish stripping product to get rid of the existing finish. Once you remove it, you can do the necessary touch-ups and repairs before applying the new finish.
Before restoring your old wood furniture through this route, though, you have to figure out if it is indeed the perfect time to refinish it. To determine if your antique and old wooden pieces need refinishing, watch out for the following signs:
- The existing finish already comes with noticeable watermarks and rings.
- The furniture has blemishes and worn-out patches even after you clean it.
- It has a sticky feel even after cleaning.
- The wood starts to appear darker than usual.
- There are noticeable chips and flakes in the finish.
- There are cracks starting from the present finish that goes deep down into the wood.
In case you notice a specific piece of wooden furniture in your home, such as a solid wood dining table, that exhibits the mentioned signs then refinishing it may be the best thing that you can do. To begin this restoration project, the following steps are among those that you should undertake:
Step 1 – Clean the furniture thoroughly
Thorough cleaning is necessary before starting the old wood refinishing project. This step is all the more important, especially if the piece you are planning to refinish is kept outside or left in storage for a long period. This will help you get rid of the dirt and dust that might have accumulated in the piece.
The best cleaning solution for wood furniture is a mixture of warm water and dish soap. Scrub this solution down the furniture’s surface with the help of a sponge. Make sure to do so by applying gentle strokes. If the furniture comes with carvings and moldings then scrub it with the help of a paintbrush.
After scrubbing and cleaning the surface, use a sponge to rinse it off using fresh water. Your goal is to clear away all the soap. When that happens, you can get a towel to pat it dry.
Step 2 – Examine the present condition of the furniture
After cleaning the furniture, it is time to observe it more closely to figure out the level of restoration that you need to do. If the piece is already too old then expect to see several cracks, dents, paint stains, white rings, and chips in it.
Assess the piece in its entirety and figure out the steps necessary in making the repairs. By doing the assessment, you will know the specific supplies needed in refinishing it, like wax filling compound, epoxy putty, and scrapers.
Step 3 – Take off the existing finish
You can do this step using either of the two methods – sanding and applying a chemical stripper. If you plan to use the first method, which is sanding, then you should use a power sander, sanding block, or coarse sandpaper in stripping off the existing finish. Continue doing this until you get a smooth surface.
After taking off the majority of the existing finish, get a medium-grit sandpaper and use this in getting rid of any shine even further. Lastly, smoothen the wood by using a fine-grit sandpaper. Continue doing this until you completely remove the existing finish.
Alternatively, you can use a chemical stripper, which helps in stripping the wood’s finish with the least amount of effort. The best chemical stripping product, in this case, is the semi-paste or liquid version. You can go for one with or without methylene chloride. To apply it, use a bristle brush. You can use this tool in spreading the stripping product evenly over the wood’s surface.
Leave it on the surface for the recommended amount of time. Wait for the material of the wood’s surface to wrinkle up in the sense that you can already peel it using a scraper. Scrape the surface until the entire finish is scraped off. After that, put on a lacquer thinner as a means of wiping the wood. This should get rid of any remaining wax, finish or residue.
Step 4 – Coat it with a sealant
Once you have stripped your furniture with the finish, let it dry completely then continue with the sealant coating step. If you choose to use a chemical stripper in the previous step then it is necessary to get a 120-grit paper to sand the piece. This is crucial in fully removing leftover residue.
After that, you can start sealing the wood in preparation for staining. In this case, you can use a sealant. Putting on a thick coating of this sealant into the base can protect the wood material while also creating a base so you can evenly spread the stain. Make sure that the coat of sealant you applied is thick enough. Let the wood fully absorb it, too.
Once done, get a clean rag to wipe leftover sealant. Allow the sealant to dry completely before sanding down the surface using fine-grit sandpaper.
Step 5 – Paint or stain the wooden furniture
Painting or staining the wooden furniture should come next. If you choose to paint it then you can rest assured knowing that you have several choices. It is because various paint finishes are available, like latex and oil-based enamel that can offer a sturdy coating. Just make sure to consult the instructions indicated in the paint’s label prior to putting on a coat of it into the wooden furniture’s surface.
You also have many choices in terms of stains. You can go for the oil-based ones, gel stains, and water-based versions. Also, take note that you have several choices when it comes to the colors of the stain. With that in mind, do not forget to test a particular color on a different wood before its actual application to your old wood furniture. Consult the label’s instructions regarding the staining process, too, and follow it.
Step 6 – Put on a coat of your preferred finish
Now on to the last step of the old wood furniture refinishing project, which involves putting on the finish. The good news is that you can pick from a wide range of finish products. Just make your choice based on vital factors, like the furniture’s needed durability, your preferred look for the furniture, the specific wood material used in creating the piece, the purpose of the furniture and how often you use it, and your level of skills and experience in refinishing or restoring old wood furniture.
If you choose a spray-on finish then you also need to prepare some spray tools so you can complete the job. If you are still a beginner in the field of refinishing then it is advisable to go for a type of finish that you can brush on and wipe. Among your specific choices for the finish are the oil finish, polyurethane varnish, and wipe-on varnish.
The oil finish is a good choice because it is easy to use and wood seems to absorb it well, promoting ease of rejuvenation in the future. However, it does not offer as much protection to the wood surface as the other finishes. With that in mind, it seems to work well on dressers or chairs. It does not work that efficiently on tabletops.
You can also go for the wipe-on varnish, which allows the application of multiple coatings if necessary. This is beneficial because this can give you full control over the level of shine you want your furniture to obtain.
If you want a more durable finish, which can protect the old wood furniture from dents and scratches for quite a long time then you may want to try out the polyurethane varnish, specifically the brush-on and oil-based types. It works perfectly for kitchen, dining, and coffee tables that seem to receive excessive wear and tear.
After putting on your preferred finish, it is time to improve its luster and shine while also keeping it fully protected from issues, like scratches by coating it with paste wax.
Conclusion
You do not need to buy a new piece of furniture every time the present ones in your household get old. All you have to do is to learn the steps associated with restoring old wood furniture through refinishing. With that, you can bring back the beauty of the furniture while adding a new flair to it.
I am looking forward to seeing more things on this site it sounds very interesting