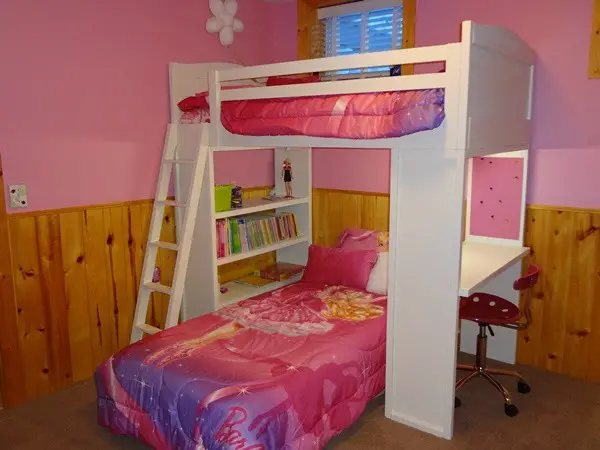
This homemade twin bunk beds with shelves diy project has a step by step tutorial that has all the details you need to create strong vertical beds for your kids.

Make sure you like The Homestead Survival on Facebook, Shop on AMAZON with Us and explore our PINTEREST BOARDS for innovative ways you can become self-sufficient on a budget.
Here is an easy way to create twin bunk beds with shelves. Before beginning this project, ensure to read through the entire plan.
Materials List
1 – 2×6 @ 8 feet long or stud length
2 – 1×6 @ 10 feet long
3 – 2×2 @ 8 feet long
1/2 sheet – 3/4″ plywood, particle board or MDF
11 – 1×3 @ 8 feet long (used for slats and guardrails – adjust the amount you buy to your needs)
2 inch screws
3 inch screws
1 1/4 inch finish nails
1-1/4″ Pocket Hole Screws
Elmer’s Wood Glue
Elmer’s Wood Filler
120 grit sandpaper
primer
wood conditioner
paint
paintbrush
– Use a jigsaw to carefully cut out an arch shape for your headers. Two of these will be required.
– Clamp both headers together and sand the top edges with coarse sandpaper to matching perfection.
– Remember to attach the headers to both panels. Before assembly, ensure to use the Kreg Jig to drill all pocket holes.
– Now, use 1¼-inch finish nails and glue to attach the base trim to the panels on the outside.
– You could either choose to use 1 1/4 inch screws and the Kreg Jig for ¾ inch stock to attach the siderails or use either brackets, so as to be able to keep them in place.
– Use 1 ¼inch finish nails and screws or glue to blue square guardrails. Then use scrap 1x3s to fill in any gaps.
Precaution:
– Ensure to wipe off excess glue from bare wood.
– Before attaching wood with screws, always pre-drill every hole.
Click here to read about homemade twin bunk beds with shelves diy project:
http://www.ana-white.com/2011/05/chelsea-top-bunk

