
Ever thought about building a brick smoker? Well, this guide will walk you through step by step. Let’s dive in.
Step 1: Pour the Concrete Slab
You will use metal grill grates to know the placement and size of your brick smoker. If you want a barbecue that features thicker walls, decide on this stage. Next, you want to mark the area where you will be building your brick barbecue and clear all the grass or any debris. Once that is done, make sure to burrow the site to 8 inches in depth.
You need to level the surface with a tamper, then use pea gravel to 3 inches in height. Once that is done, compact again using a tamper.
The next thing you want to do is to mix cement in line with the manufacturer’s guidelines. Pour this mixture into the hole until it is filled. You can then smooth the level using a trowel then allow your cement for 24 to 48 hours.
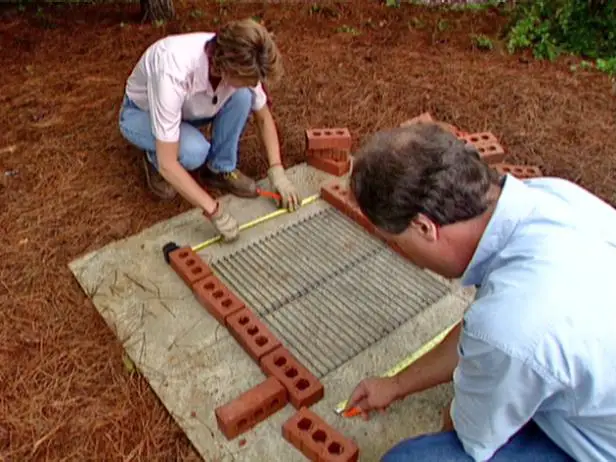
Step 2: Dry-Fit the Bricks
You need to dry-fit your first course before placing them in mortar. Next, place the bricks around a concrete slab parameter, which means that you will leave a half-inch gap between your bricks. This should be meant for the mortar. Please take note that the corners of your bricks should be perfectly square.
Step 3: Lay the First Course
The first thing you will need to do is to prepare a premixed mortar. Now trowel a layer of the mortar along the lines you marked. Once that is done, it is time to lay the first brick and press gently.
Step 4: Lay the Next Two Courses
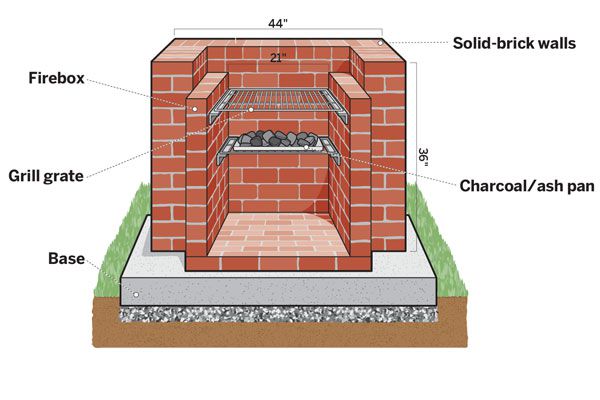
The brick barbecue should have a front opening, meaning these two courses and the rest of the bricks should be placed from the behind. The front opening allows for easy access to charcoal and ash. At the very top of the prior course, apply mortar.
Once you’ve applied the mortar, gently lay the first brick in a way that the joints are firmly attached. To achieve a perfect fit, consider cutting the bricks with a cold chisel. Repeat the same procedure for the remaining course.
Step 5: Lay the Final Courses
In this stage, you need to turn your bricks – starting with your fourth course and the preceding ones. You are doing this so that they act as your grill gate support ledges. Additionally, having some at various heights offers more cooking space.
It would help if you continued laying your bricks until you will get your desired height. Take note that your final course needs to be strong enough to help if you used solid bricks.
Step 6: Finish the Brick Smoker
Once you have laid your last course and before your mortar dries up, you will need to strike the joints to achieve a concave depression. Brush the scrape the moment the cement has started to cure. That is it. You have your brick smoker in 6 easy steps.
could this be used as a bread/pizza oven if a door was put in place? and why is there no door?