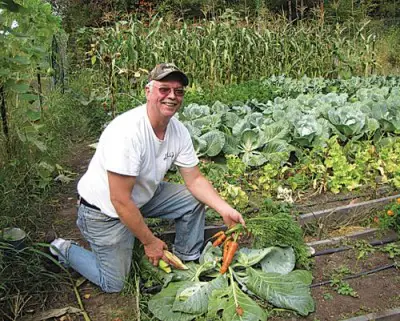
This step by step tutorial of how to grow great homesteading carrots is so detailed that you are almost guaranteed a flavorful harvest… look to the bottom of this page to connect with the tutorial.
Photo Source

There is nothing more satisfying than growing and cooking your own food. We all enjoy the taste of fresh grown fruit and vegetables and if more of us knew how easy it is to achieve eating them every day, we’d never eat anything else again. So let’s get the message out there starting with growing your own carrots.
First you will need to pick which variety of carrot you are going to grow and there are plenty of them out there. You can pick any type that you like but just take one thing into account that if you have heavy soil carrots with long slender roots will not grow well.
Once you have picked your variety it’s time to plant them and to do that you need seeds. Carrot seeds can be extremely fiddly and hard to plant with the space between them that they need. To make this easier you can buy pelleted seeds which are more expensive but far less hassle.
Next you will need to prepare the soil which should be smooth and fine with a bit of well mixed compost in. The trench for planting should be around ½ an inch deep. Spread the seeds or seeded pellets around ¼ of an inch apart and then cover with a ½ inch of soil. Pat down the soil firmly and water until moist.
Make sure to keep your carrots well watered as they are growing. Do not think that just because they are growing they no longer need watering, this is not the case. Once the ferny tops do start to show it is time to thin them out. To do this pull carrots out leaving around a ¼ of an inch between each carrot. When 6-8 inches tall mulch with straw or seed free grass hay.
By late summer you will be able to harvest a few of your carrots for baby carrots and snacks. Again as when you thinned take every other carrot leaving more space for the remaining carrots to grow. When it comes to full harvesting you can either pull the remaining carrots up as they grow, or wait until after the frosts to pull them all out.
Once harvested you need to decide how you are going to store them other than in your tummy. One way is to can them and this method will keep them fine to eat for decades. You can can them whole, halved, in chunks and sliced by either a hot pack method or raw pack method. There are plenty of websites available to help you with these methods.
You might instead choose to dehydrate your freshly cropped carrots. This is simple and fast and starts with the washing and peeling of your carrots. You should then top and tail them and slice and dice. Then place them in cold water whilst you boil some water in a pan. Once boiling place your carrots into the water and simmer for three minute. Drain them and place them into iced water to cool. Now dehydrate, again instructions for this can be found on various websites. Once dehydrated store in an airtight container.
Finally you’ll need some wonderful recipes to create from your home grown carrots. Here are a couple of simple ones to get you started.
Flemish Carrots
-
6 carrots cut into 2 inch strips
-
2 tbsp butter
-
1/2tsp salt
-
1 tsp sugar
-
½ cup water
-
½ cup cream
-
1 tsp lemon juice
-
First sauté the carrots in melted butter for 5 minutes.
-
Stir in the salt, sugar and water.
-
Simmer covered until tender.
-
Finally add cream and the lemon juice and leave until a skin forms on top.
-
Finally serve.
Candied Carrots
-
8 carrots
-
Water
-
2 tbsp butter
-
¼ cup of brown sugar
-
Slice the carrots and simmer in boiling water.
-
Drain off most of the water saving ½ a cup.
-
Add butter and brown sugar to the carrots and simmer for ten minutes covered.
-
Remove the cover and keep cooking. The liquid will cook down leaving the carrots covered with glaze.
-
Stir carefully to ensure the carrots do not become scorched.
-
Finally serve.

