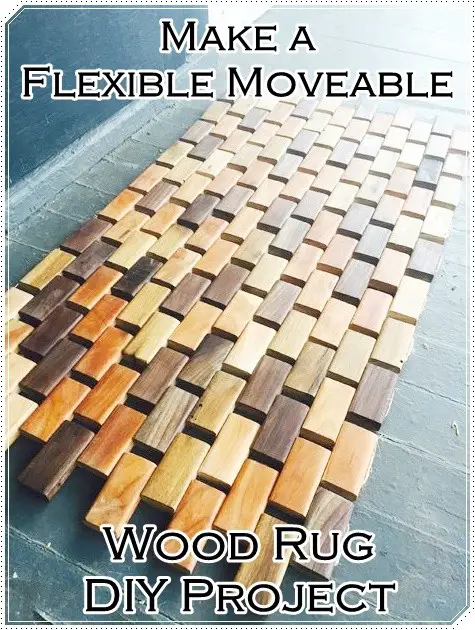
This tutorial of how to make a flexible moveable wood rug diy project is simple to make and can be used in any room in your house.

Make sure you like The Homestead Survival on Facebook, Shop on AMAZON with Us and explore our PINTEREST BOARDS for innovative ways you can become self-sufficient on a budget.
One of the most unique and fulfilling projects you can take on as a true homesteader is making a wood rug. It may sound odd, but when you’re finished you’ll love the results. Here’s what you’ll need:
• A planer
• A miter saw
• A joiner
• A drill press
• A table saw
• 3 feet of 1-by-8 walnut
• Bench sander
• Cherry
• Oak
• Approximately 30-feet of natural fiber rope like twine
The first thing to consider is the wood you use. The best thing to do is use differing woods that will showcase your design skill. A common combination is oak and cherry walnut. You can use scraps you have, which is a great repurposing option for wood laying around your workshop or garage. Run your wood through a planer to get the same thickness for each of your pieces.
Next, you want to send your wood scraps through a joiner. Rip them to about 1.5-inch strips to ensure there is a flat side for the table saw. When you get the flat side, rip them with your table saw. You can set your fence for 1.5-inches and rip about 20 pieces.
Once your strips are done, you can then decide what length to cut the individual pieces down to. It is common to cut them into 3 pieces, but you can customize the number of pieces to your own specifications. Clamp a stopper to your miter saw so you can get consistent lengths as you cut. This is the most time consuming portion of the job, but it will be worth it. You need about 140 pieces, but you can cut more to be safe.
When you’re done cutting, now you’re ready for the fun part. Here, you just have to start your drilling. Here is where your drill press will be your best friend. Just think of having to drill more than 140 pieces without it! Plus, you are going to be drilling holes on each side. Make sure you drill and sand so you have square edges to work with—this is the easiest way to have even holes as you work.
There’s more work to be done after your holes are done. Now you have to sand each piece. Use 60-grit sandpaper at the bench sander wheel and then 80-grit on the top. When you’re done, you’ll need a method of working your twine through individual blocks. A long needle is the most useful and if you can cut one to 2-feet that works best. Cut a small notch or slot in the end of your needle and crimp your twine into it. You can use your angle grinder to cut that small slit. This is a great way of securing it as you work.
Next, weave your twine through your pieces randomly. You want it random so your end result will look natural. Keep on weaving until you get them through an entire strip of multiple pieces. Be sure to leave plenty of rope at the ends. When you’re done, drill a small hole on the underside of your wood and put epoxy in. Wedge the twine with a strong dowel. When your epoxy is dry, cut down the dowel.
Finally, you can cut a non-slip rubber mat and glue it to the bottom of your squares. It will help to keep your wood rug in place. You can sand the top with 120-grit sandpaper and use linseed oil to finish it and bring out the wood color. Wipe it dry and you’re done!
Click here to read about how to make a flexible moveable wood rug diy project:
http://www.instructables.com/id/Hardwood-Rug/?ALLSTEPS
[amazon-related-products keywords=”wood mat”][amazon-related-products keywords=”Bamboo Shower Mat”]

