
This repurposed window pane storage cabinet homesteading diy project using reclaimed wood and inexpensive materials.
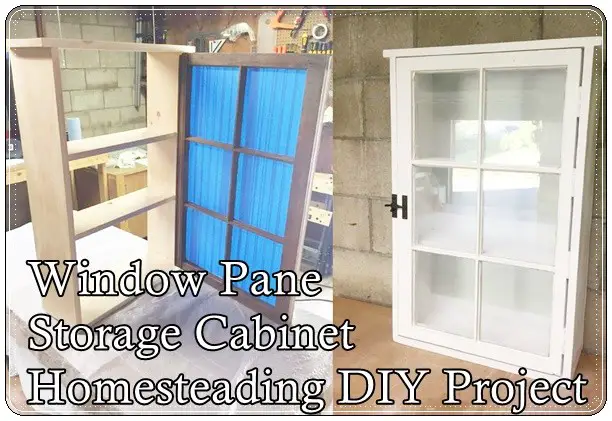
Add stylish storage to your home with this beautifully redone rustic cabinet. With three shelves and plenty of space, this cabinet adds storage room that’s perfect for dishes, serving pieces, or anything you want to display. The glass doors and hardware creates a old fashioned style.
~ Materials Used:
Antique window
Pine boards for the cabinet body (use a mix of 8″ and 10″ wide, 3/4″ thick boards)
Cans of flat white spray paint
General purpose “quick” sealant / caulk (for the edges of the windows)
Wood glue and wood filler
~ Tools Used:
Table saw
Router with straight bit (for cutting dado slots – this is optional depending on your joinery preference)
Power drill & wood screws
Air compressor & brad nailer (optional)
Jigsaw (optional)
Random orbital sander
Clamps
Card scraper & chisel
Abrasive pad (see painting section for more info on this)
With antique windows, they can be found anywhere and bought, but they must be brought up to standards with several things. First, the paint along the windows may contain lead, which was legal until 1978. Test to see if there is any lead before proceeding because it is not recommended to restore a window with lead paint that can peel off. If negative, go ahead and take out all of the metal, glue, and sealant it may contain.
Next, measure the pieces of wood, as they will differ, and add it up in terms of what the cabinet will be. Do this carefully to create the right cut for each plank. Lay them out and use a dado joint to make the cut with a router and table saw.
Once the slots are cut and corners and edges are cleaned and smoothed out, clamp the pieces together with plenty of wood glue and screws. Drill pilot holes for the wood screws – 2” recommended – for top and bottom portion of the cabinet. Once it is assembled, test the fitting for where the hinges will fit. After that, tape the glass up, attached the door as marked, and do the paint job. Use spray paint instead of brush paint and apply two coats of it over the entire frame while rearing a respirator over the face, as this prevents the inhalation of fumes. Let it dry for a day and take abrasive pads to scrape off rough spots from the paint.
Finish up by installing the hardboard in the back and smooth out the edges with the abrasive pads. Nail it with 1 ¼” nails. Cut of the excessive tape that is holding onto the glass, shine the handles and hinges, and it is done.
Click here to read about how to make a repurposed window pane storage cabinet homesteading diy project:
http://www.instructables.com/id/Antique-Window-Storage-Cabinet/