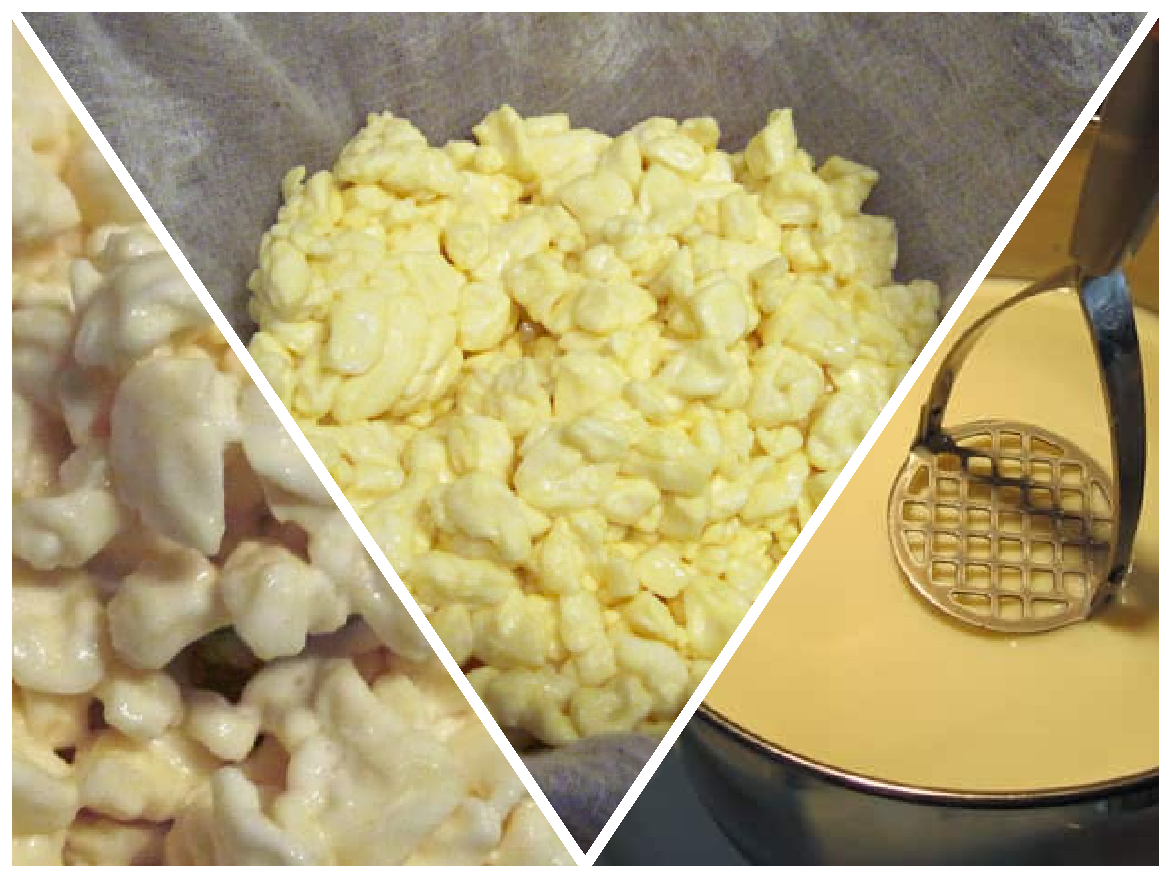
Are you a big fan of cottage cheese but tired of buying the same old packaged variety from the grocery store? Why not try making your own fresh cottage cheese at home? Not only is it easy and satisfying, but it’s also a great way to ensure that your cheese is always fresh and sustainable. In this article, we’ll guide you through the process of making large curd cottage cheese at home, perfect for use in lasagna, as a side dish with pineapple tidbits, or even with a sprinkle of fresh ground pepper.
Ingredients for Homemade Cottage Cheese
- 1 gallon pasteurized milk (skim or whole)
- 1/8 teaspoon calcium chloride diluted in 1/4 cup water (if using store-bought milk)*
- 1 package direct-set mesophilic starter, 1/4 teaspoon bulk mesophilic starter or 4 ounces prepared mesophilic starter
- 1/4 teaspoon liquid rennet (or 1/4 rennet tablet) dissolved in 1/4 cup cool water
- Cheese salt (optional)
- Cream, 1-2 tablespoons (optional)
- Herbs (optional)
Tools needed:
- Thermometer
- Large, stainless steel pot with a thick bottom
- Cheesecloth
- Colander
Step-by-Step Instructions for Making Large Curd Cottage Cheese
- Warm the milk to 72F. If using calcium chloride*, add it now. Add the starter and mix thoroughly. For a richer flavor, you can use skimmed milk for this cheese and save the cream for another recipe, adding a little cream back in at the end. A large, stainless steel pot with a thick bottom is recommended for making this cheese.
- Add 1 tablespoon of the diluted rennet and mix thoroughly with a gentle up and down motion. Cover and let set at 72F for 4-8 hours, or until the curd coagulates. The curd will be rather soft.
- Cut the curd into 1/2 inch cubes. Allow to set, undisturbed, for 10 minutes. Use a long knife that reaches all the way to the bottom of your pan and move smoothly and gently – don’t tear the curd. Try to keep your cubes as uniform as possible so your cheese cooks evenly.
- Place the pot on low heat. Increase the heat by two degrees every 5 minutes, until the temperature reaches 80F. Stir gently to prevent the curds from matting.
- Increase the heat by three degrees every 5 minutes, until the temperature reaches 90F, stirring gently to prevent the curds from matting.
- Increase the heat by one degree per minute, until the temperature reaches 110F, stirring gently to keep the curds from matting. Slow, gentle cooking makes for a more tender curd.
- Maintain the temperature at 110F for 20 minutes, or until the curds are sufficiently cooked and no longer have a custard-like interior. Stir gently every few minutes.
- When the curds are sufficiently cooked, let them settle to the bottom of the pot for 5 minutes.
- Pour off the whey. Pour the curds into a colander lined with cheesecloth. Tie the corners of the cheesecloth into a knot. If a less sour cottage cheese is desired, wash the curds by dipping the bag several times into a bowl of cool water.
- Let the bag drain for several minutes.
- Rinse the bag in a bowl of ice water to cool and place the bag in a colander to drain for 5 minutes.
- Untie the bag and place the curds in a bowl. Break up any pieces that have matted. If desired, add the heavy cream to produce a creamier texture. As you can see from the photos, this recipe makes a LARGE curd cottage cheese, which we prefer. However, if you prefer small curds, you can find the recipe in the Home Cheesemaking book.
- Add salt and herbs to taste, if desired.
Store the cottage cheese in a covered container in the refrigerator for up to one week.
Tips and Tricks for Making the Perfect Cottage Cheese
- Calcium chloride is added to milk that has been commercially pasteurized because the heating process decreases the amount of calcium in the milk, which negatively affects the coagulation of the milk (so the rennet can’t do its job as well). If you want to pasteurize milk at home, heat the milk in a clean non-reactive pot to 145F and hold for 30 minutes, then chill in an ice bath to 40F and refrigerate until ready to use. However, you can skip this step if you’re using farm-fresh milk.
- Use a thermometer to ensure the milk reaches the desired temperature.
- Be gentle when stirring the curds to prevent matting.
- Slow, gentle cooking makes for a more tender curd.
- The cheese will taste best when eaten fresh, so consume within a week.
Where to Get Cheesemaking Supplies
You can purchase some of your cheesemaking supplies locally or online from retailers like House of Homebrew or Cultures for Health.
Final Thoughts
Making your own cottage cheese at home is a fun and easy way to ensure that your cheese is always fresh and sustainable. Not to mention, it’s a great way to use up any excess skimmed milk you may have lying around. Give this recipe a try and let us know how it turns out! We’d love to hear your feedback and see what other recipes you’d like to see next.


