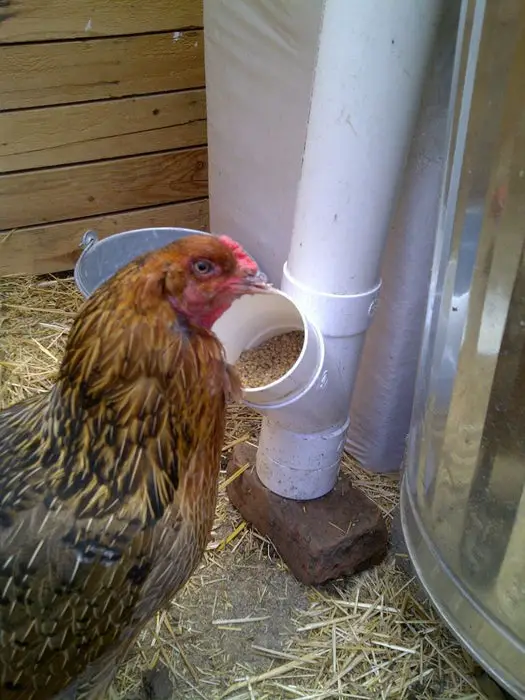
If you have tried all chicken feeders and haven’t got the results you needed, it’s time to check out the PVC chicken feeder. This is one of the feeders that will meet your needs as a poultry farmer. Because you can quickly fill it, it’s weather-resistant, quite straightforward to craft, and above all, inexpensive as compared to other chicken feeders. In this quick guide, I’ll walk you through how to create your PVC chicken feeder, step by step.
Step 1: The Trial and Error
Sure, the chances are that you have come across a ton of chicken feeders, but the PVC chicken feeders are quite different. With this chicken feeder, you will include a 3-inch to your Y-connector because without this extension; your chickens are more likely to spill food.
Additionally, the 180 degrees rule cut off might not be effective because your birds may still spill a lot of feed. Even worse, restricting your pipe from rodents and covering it so that any water doesn’t get in would need more engineering work.
So instead of doing all these, there is a quick fix and a proven formula to make sure there’s little to zero feed spillage. That said, set up your chicken feeder on a brick because the chickens love this altitude so much. Your final version should be 6-inch length to avail the food where your chickens can easily get and feed.
The Alternative
But there’s also another way to make your birds feed well. By adding a plug at the bottom of your Y, your chickens can reach the food without any difficulties. And the best of all is that doing this won’t consume much of your time – at most 3 minutes. Note: it would be best to use plastic materials or any other thing you can easily clean.
It is essential to let you know that most of the plugs available in the market are just fine. The only downside is that they will take you back to your initial problem – the height. But not to worry, this is an easy fix. All you have to do is raise the chicken feeder a little higher, and you are good to go.
Step 2: Your Materials
Now that we have most of the possible problems out our way, it’s time to gather our materials. You’ll have the freedom to choose the dimensions, depending on your specification. All the same, a 3-inch PVC would do. If you like, feel free to use a 2 or 4-inch PVC pipe. Usually, a PVC is 10-foot, so you can cut it into pieces and make up to 3 PVC chicken feeders. That said, below is what you will need:
- 3-inch diameter pipe (should be 20-inch long)
- 3-inch diameter pipe (should be 6-inch long)
- (3-inches long)
- Forty-five degrees Y-connector.
- Hacksaw
- PVC cement
Step 3: Assemble Your Tools
It’s the last step – assembling your tools. Feel free to gather your materials using the picture below (use the hyperlink on the heading). Now, you only need to glue three pieces to connect with your Y splitter and the bottom cap, and that’s it – you are done creating your PVC chicken feeder. It is essential to mention that you should cure your chicken feeder for at least one day to make sure that it is not stinky.

