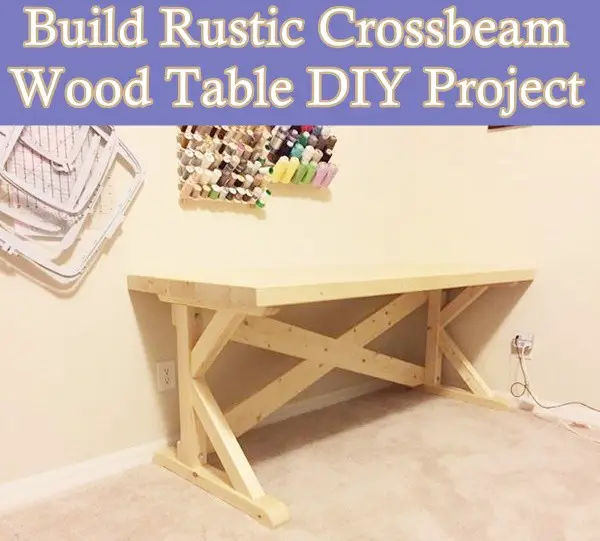
How to build rustic crossbeam wood table diy project is detailed in this step by step tutorial that everyone can follow.
Make sure you like The Homestead Survival and Homestead Survival Facebook, and explore our PINTEREST BOARDS for innovative ways you can become self-sufficient on a budget.
This is an easy Do-It-Yourself project on converting a chunk of lumber into furniture, such as a desk anywhere in the house. The wood should be 2×6 each and be quite dry. Have in hand a table saw, wood chisels, a drill, a circular saw, a hand saw, measuring tools, and a router with a ¼’ bit. Take 4 boards and glue them up together heavily and use clamps to keep pressure evenly and straighten any boards. When the glue has set up for about an hour scrape off the excess. This will reduce the wear and tear on your jointer blades later.
Materials:
15 – 2 X 6 X 12′ boards.
quart of glue
4 X 3/8″ X 5″ carriage bolts + nuts and washers per table.
1 quart of your favorite colored finish ( this project was done in a semi-gloss water based poly)
24 plate joiner biscuits per table are optional
Tools
Table Saw
Jointer
Wood Chisels
Drill
Circular Saw
Hand Saws
Assorted measuring tools
Router with 1/4″ roundover bit
Optional Tools
Drill Press
Miter Saw
Biscuit Joiner
Planer
Band Saw
Oscillating Spindle Sander
Next, straighten the boards with a laminator to keep every edge parallel and smooth. For the legs, they are K brace style as they are very strong and provide enough clearance to move in and around with a chair. The angled braces are laid out with stair gauge blocks and a framing square; use tenon joints with normal wood glue and cut tenons with a table saw. The 1/2″ relief cut on the bottom can be made by clamping two feet together and then drilling a 1″ diameter hole 3-inches from each end.
Make the back cross brace with the 2 X 6 boards, planed and jointed to make it all smooth and straight. Establish the angle needed to connect the legs and remove the material in between the lines with a circular saw and chisel. Stay inside the line and use the chisels to peel off material to the line. For the finish, use common water based semi-gloss polyurethane top to bottom with multiple coats.
Click here to read about how to build rustic crossbeam wood table diy project:
http://www.instructables.com/id/Laminated-2X4-Work-Tables/