
With a decrease in conventional sources of energy, scientists are now in the hunt for alternative ways to generate power.
Various systems have been developed that can convert natural energy into electricity and the good news is that the majority of these can be done on a small scale at home.
People have talked about how you can leverage magnets and wind power to produce electricity, but less has been talked about bucket hydroelectric generators.
Sometimes known as low-impact hydro, this is one of the most straightforward systems you can build. So, in this post, I’ll be walking through how you can create a bucket hydroelectric generator, step by step.
How to Build a Bucket Hydroelectric Generator
Step 1: Prepare the Disks
We will have two parts:
- The first part is the stator, which does not move and features coils of wire.
- The second part is the rotor, which is the part that moves and features magnets that are responsible for inducing electricity.
You will need cardboard and some templates. Cut the templates that feature the stator and the rotor then attach them to the back and front of your cardboard. Once that is done, create a home of one centimetre at the stator disk centre.
Step 2: Attach the Stator
Next, make four coils that you will attach on your cardboard. You may need oval cardboard for this. After that, you should wind the wires and form a tight coil. You can then remove the coil and then repeat this process.
The next thing you need to do is to arrange your coils depending on the template scheme. Take note that the electron must take the path shown by the arrows. Once that is done, connect both ends of your coil and tape.
Step 3: Attach the Rotor
The third step of making a bucket hydroelectric generator involves getting four magnets. You’ll need to attach the magnets to the stator template you already have. You need to make sure that you have marked both the south and north pole. Next, arrange the magnets on your template.
Get a cork and eight plastic spoons. It is recommended that you make the spoons shorter so that the handle doesn’t turn out to be more than one centimetre. Check out your template and fix the spoons in the cork appropriately.
Step 4: The Turbine
In this step, you need to create a 6mm hole through your cork. It is essential to keep it centred. The next thing you want to do is to fix the spoons and add hot glue.
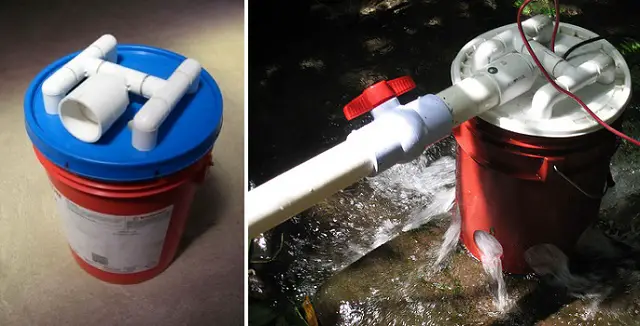
Step 5: Final Assembly
Get a bucket or a plastic tank and attach the rotor, the turbine and the stator. Find the centre of the bucket or container and create a hole of 6mm, then add the stator together with the coils above the hole you just created. Attach the shaft and the rotor (please take note that the spoons should the neck of the bucket and the magnets closer to the coils.
And that’s it. We have our bucket hydroelectric generator.